
Auto-Layout
Figma's recent update introduces enhanced Auto-Layout. Content now automatically wraps when the
viewport width is below a specific measurement.
Designers can also set minimum or maximum width for containers in Figma. Once the container reaches
the minimum width, it will automatically start wrapping the content.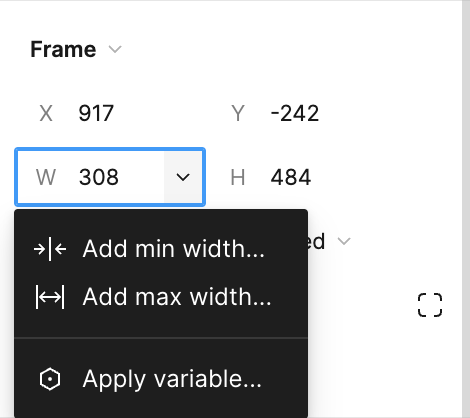
These new features empower responsive designs, combining wrap auto layout with minimum and
maximum width/height settings for containers.
2. Variables
Variables are a powerful tool for systematizing your design.
Types of Variables
| Variable Type | Defined By | Can Be Applied To |
|---|---|---|
| Color | Solid Fills | Fill Colors, Stroke Colors |
| Number | Number Values | Text Layers, Corner Radius, Minimum and maximum width/height, Padding and gap between |
| String | Text Strings and Variant Names | Text Layers, Variant Instances |
| Boolean | True/False Values | Layer visibility, Variant instances with true/false values |
Managing Variables
Creating a design system with variables is more flexible and convenient than using styles. For example:
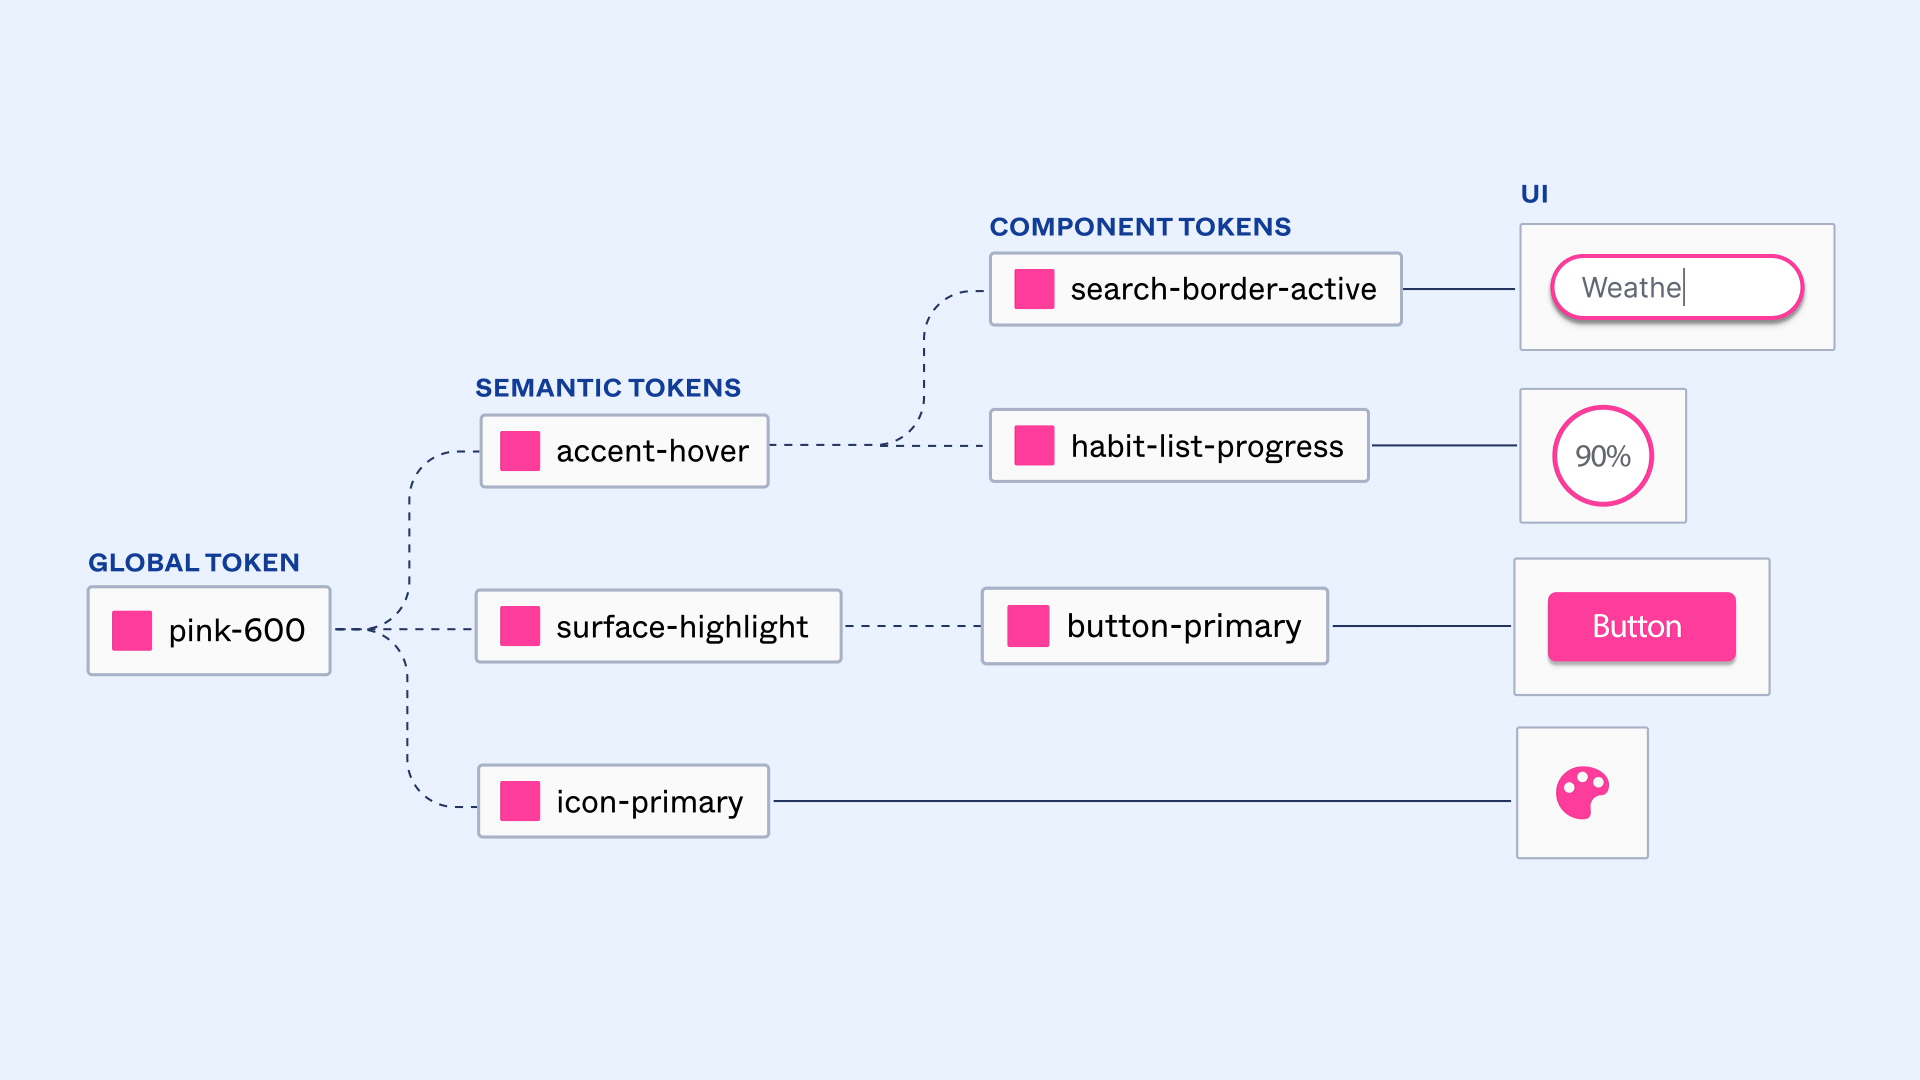
Image Credit: Figma
This approach allows easy upstream changes without manually reworking downstream elements.
Modes Variables
Variables also enable setting different design modes, such as dark and light mode or variations for different devices. This helps manage color, spacing, radius, and other values across modes.
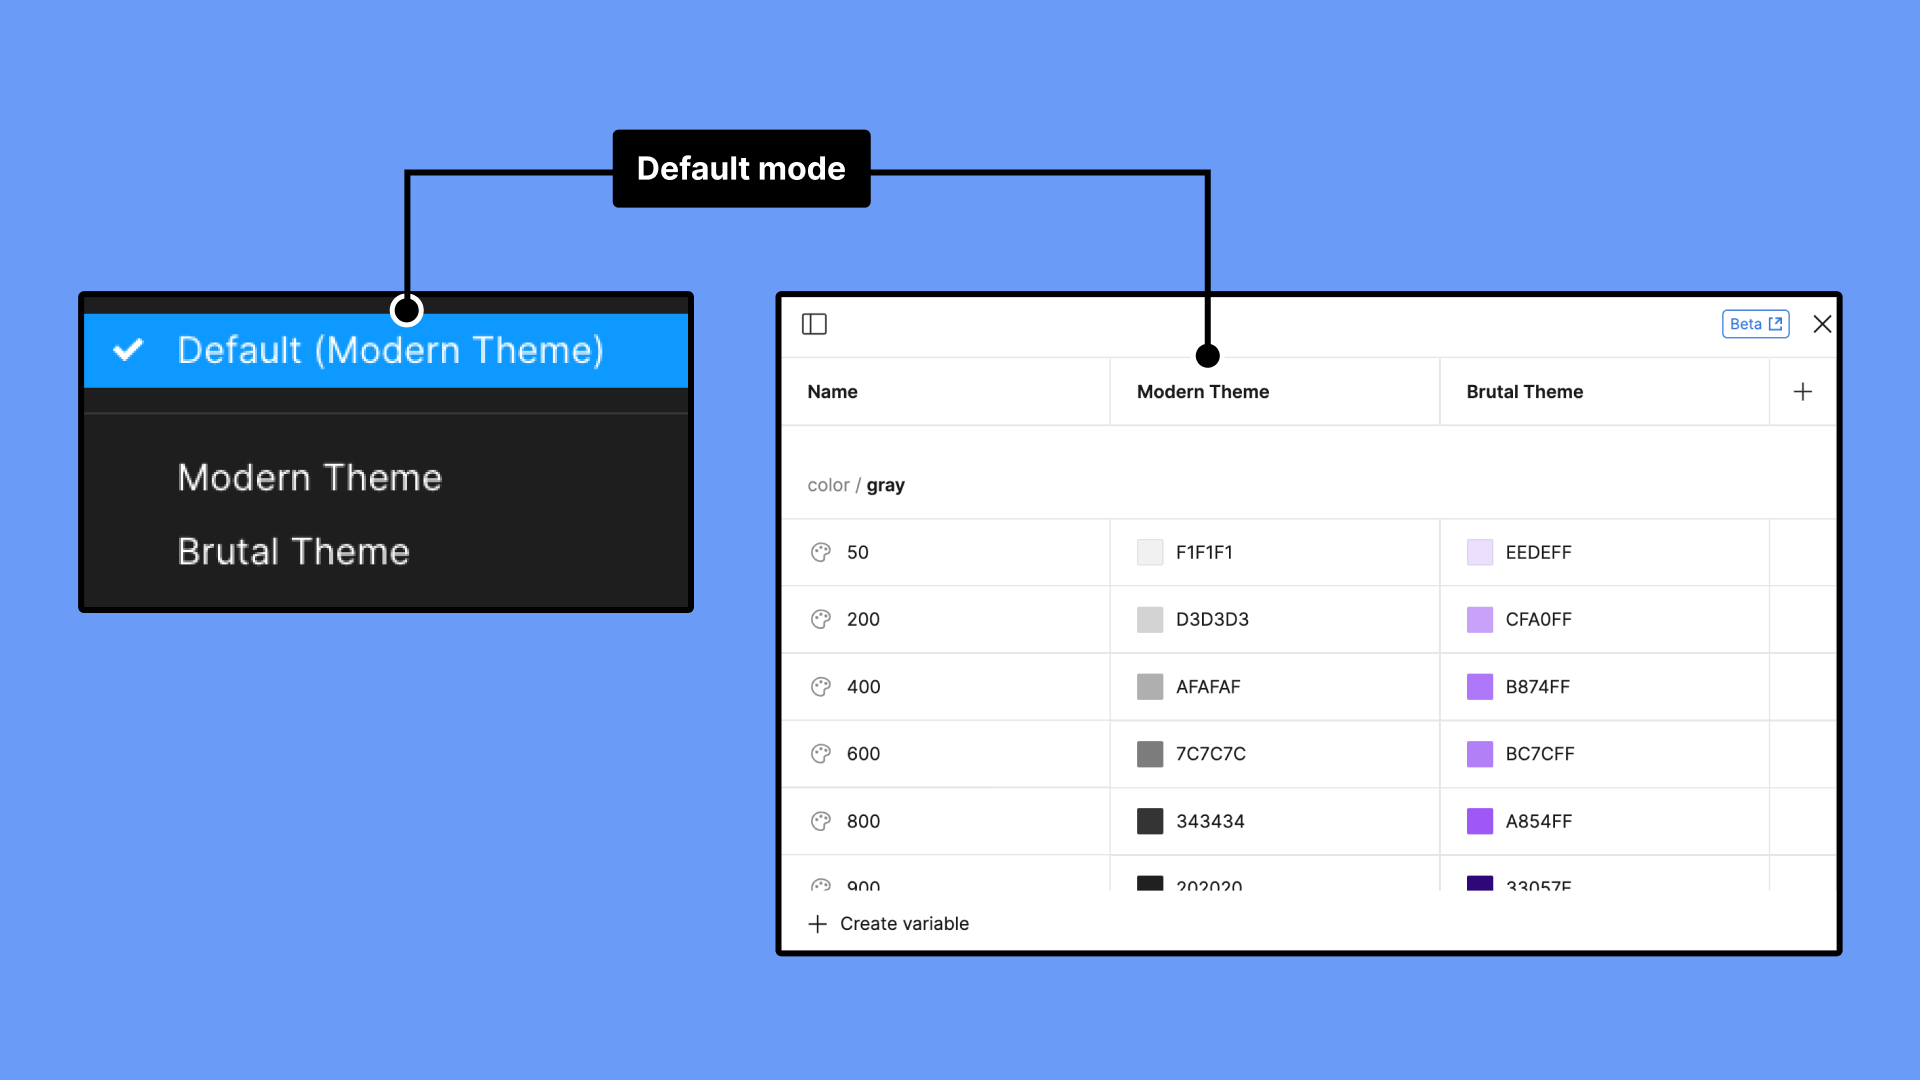
Image Credit: Figma
3. Advanced Prototyping
New features:
- Set variables
- Conditional
Variables power advanced prototyping, allowing dynamic screen updates based on variable changes. Prototyping interactions and variable binding make this possible.
Set Variables
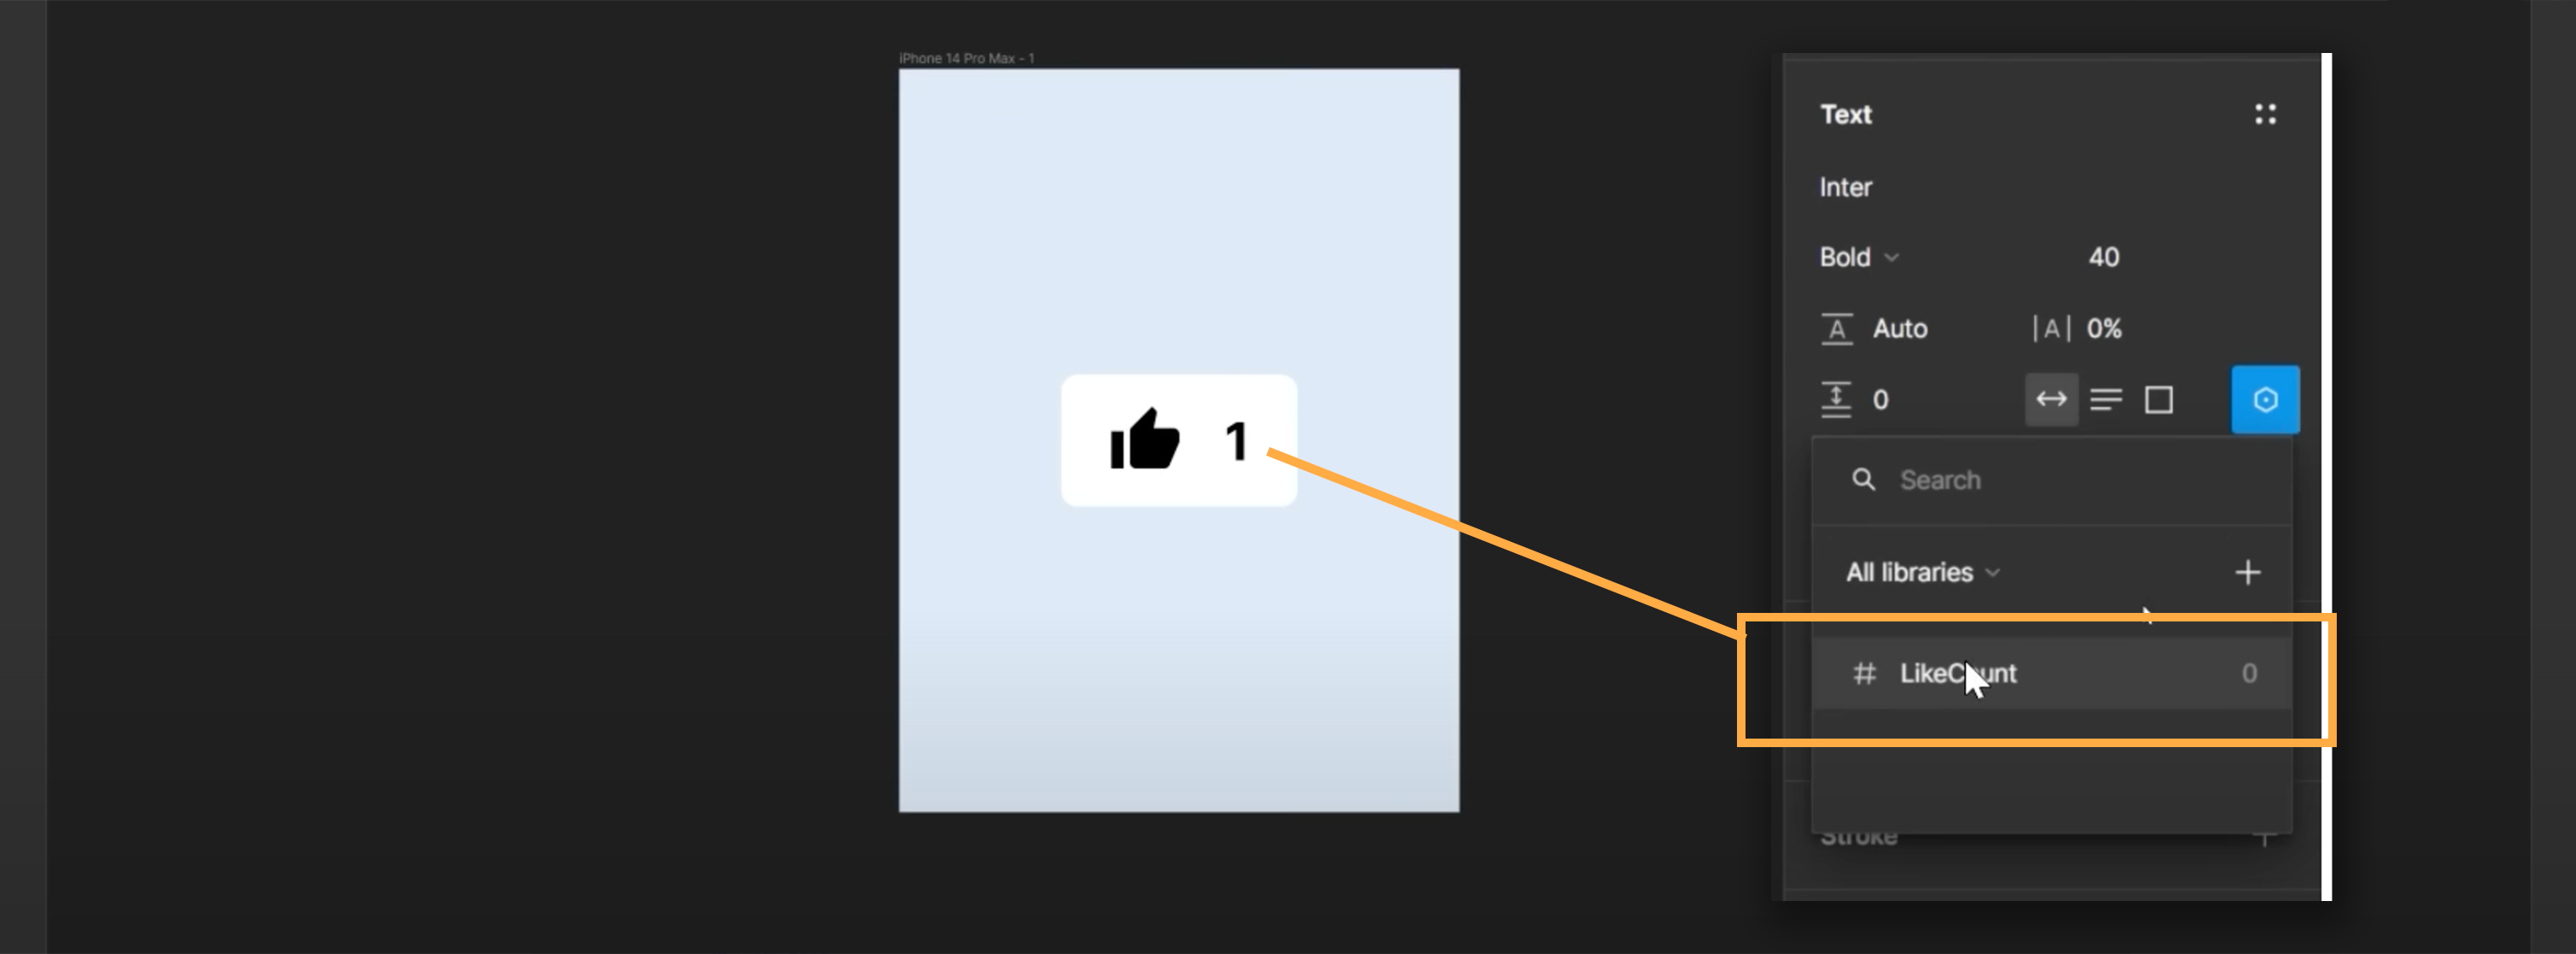
Step 1 : Set a number variable named 'LikeCount' with an initial value of 0.
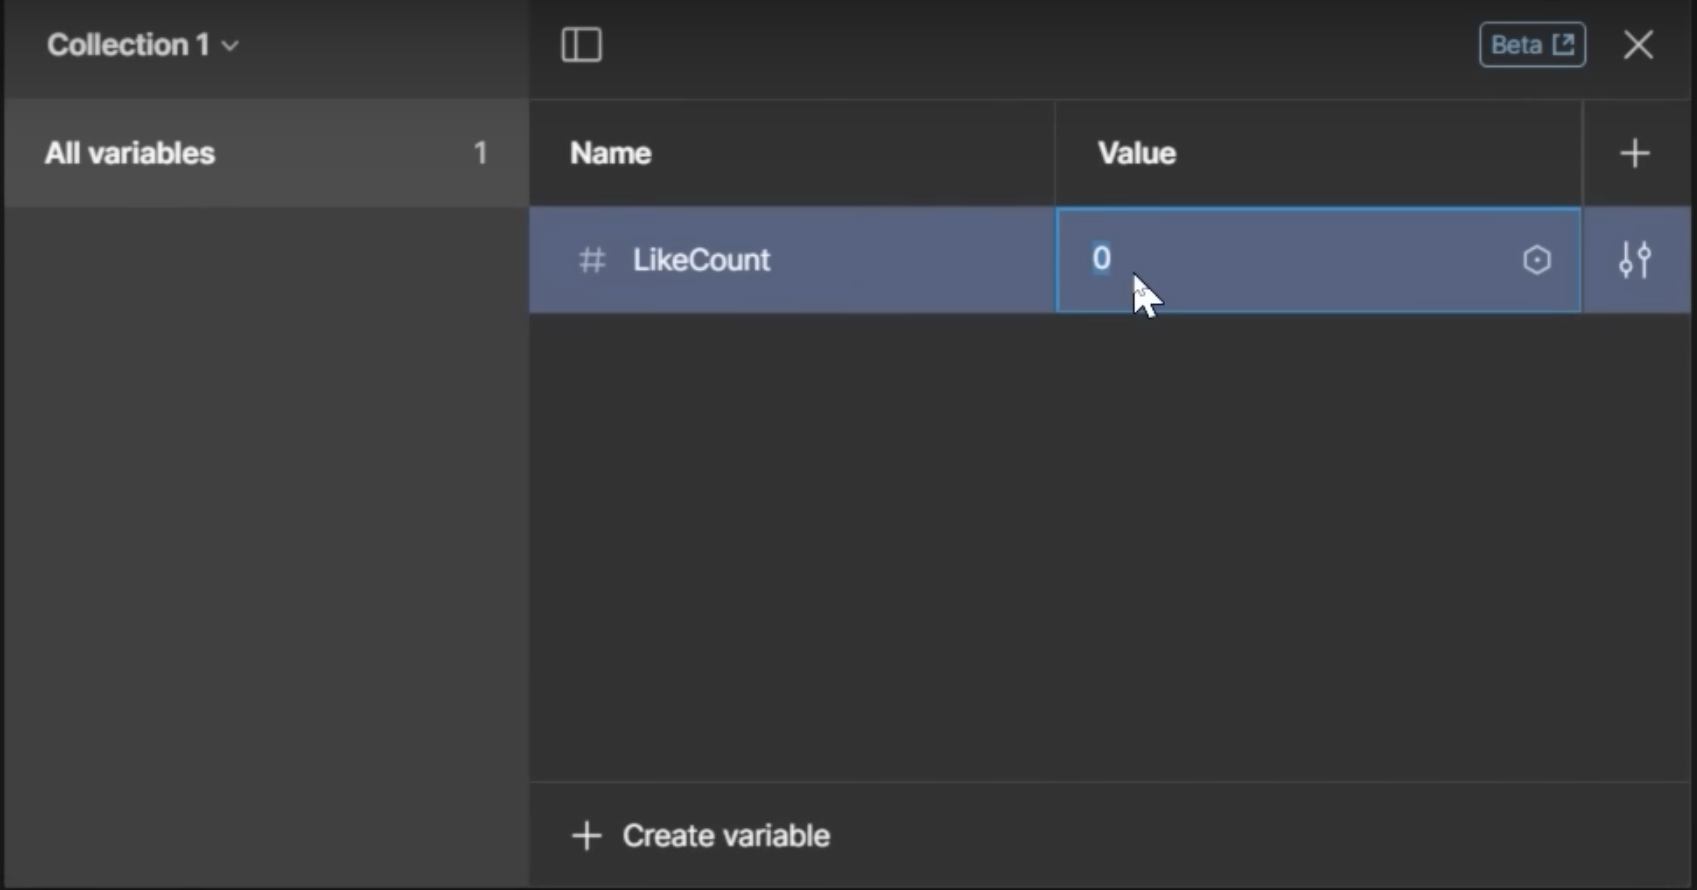
Step 2 : Bind the variable to the number next to the like button.
Step 3 : Button interaction - On click - Set variable '#LikeCount' with logic #LikeCount + 1.
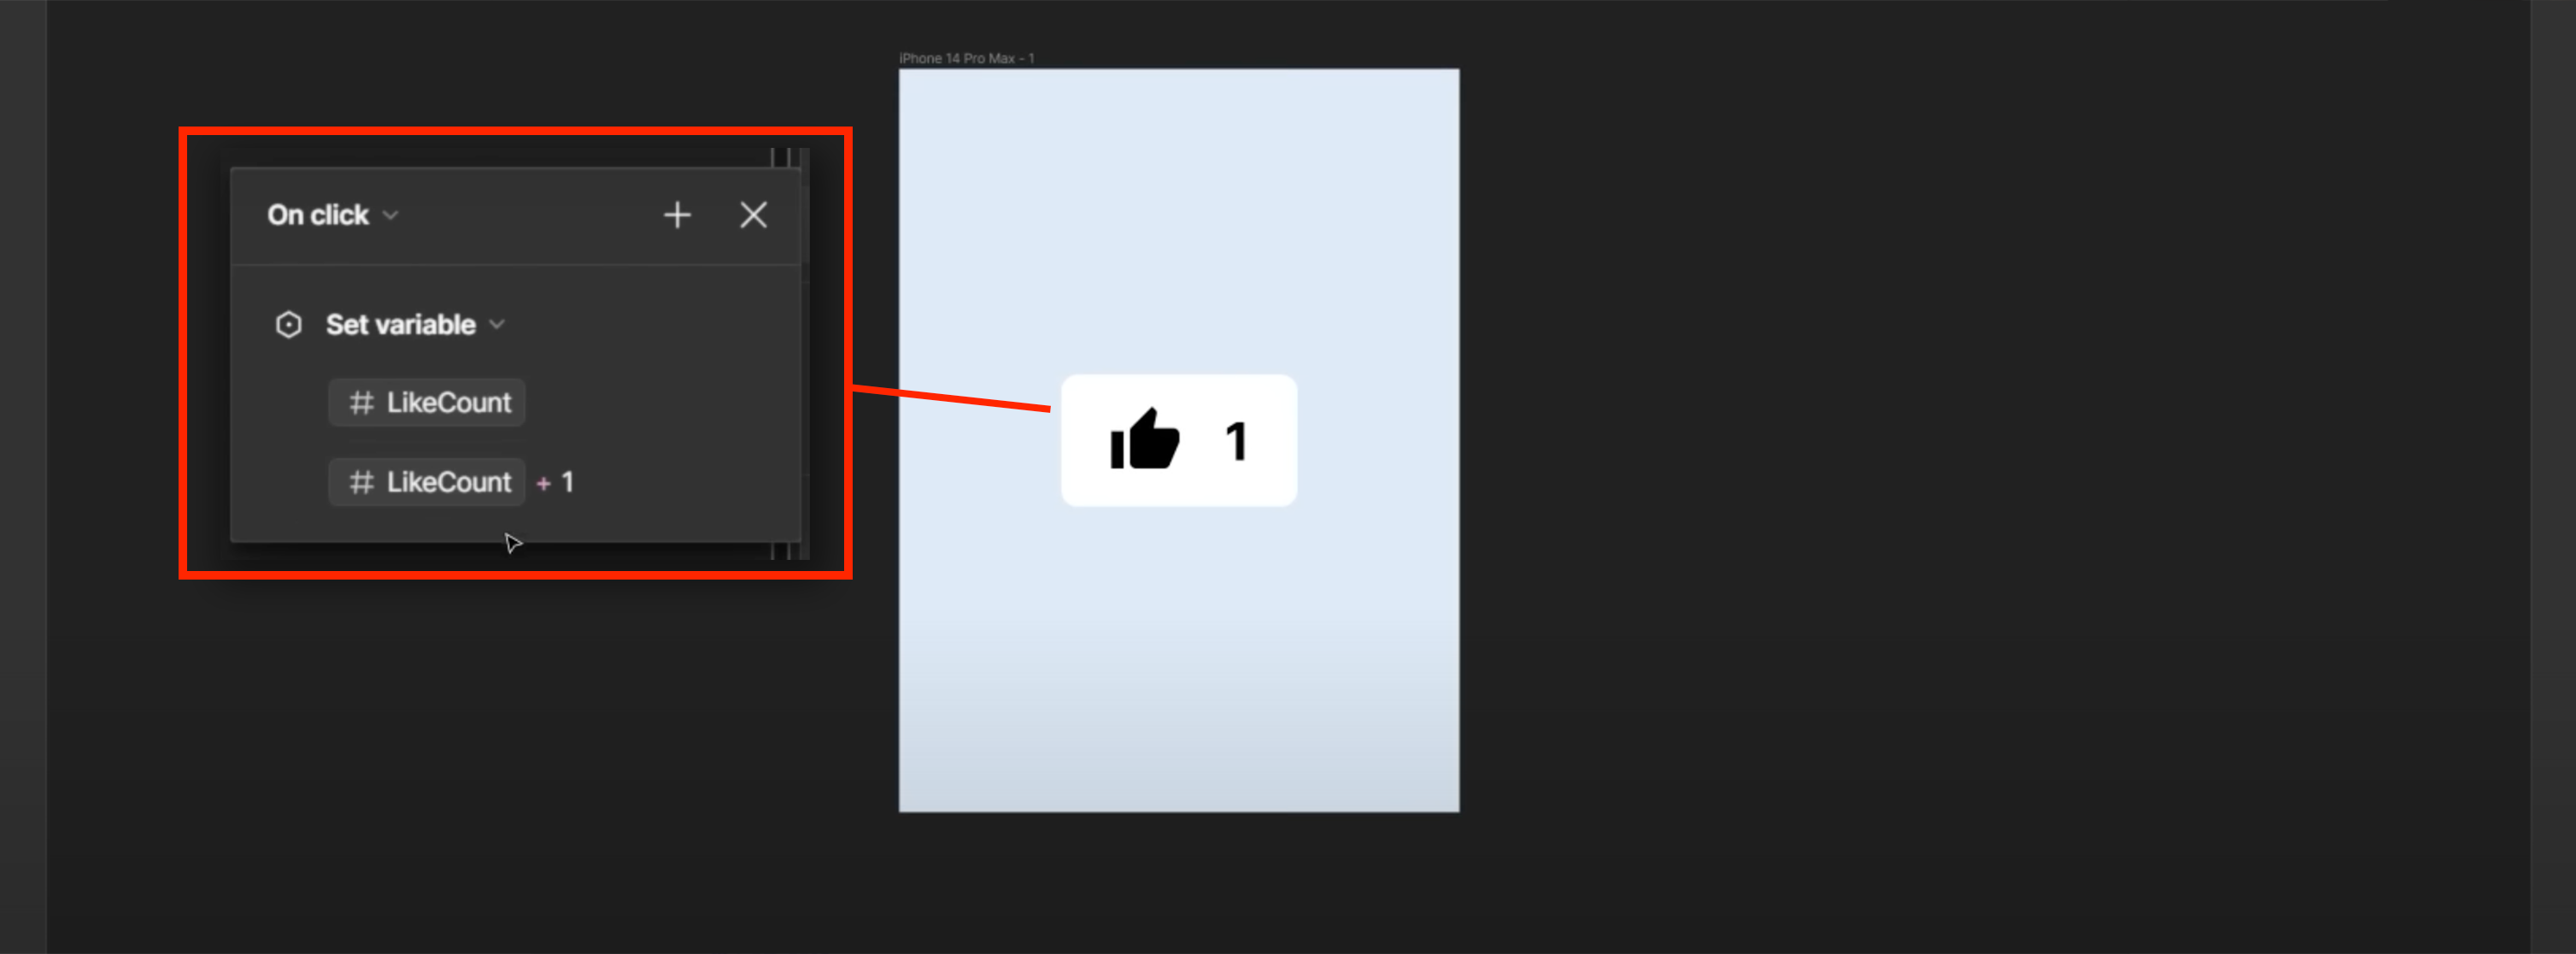
Step 4 : Clicking 'Like' increases the count.
Conditional
Step 1: Set a number variable named 'itemCount' with an initial value of 0.
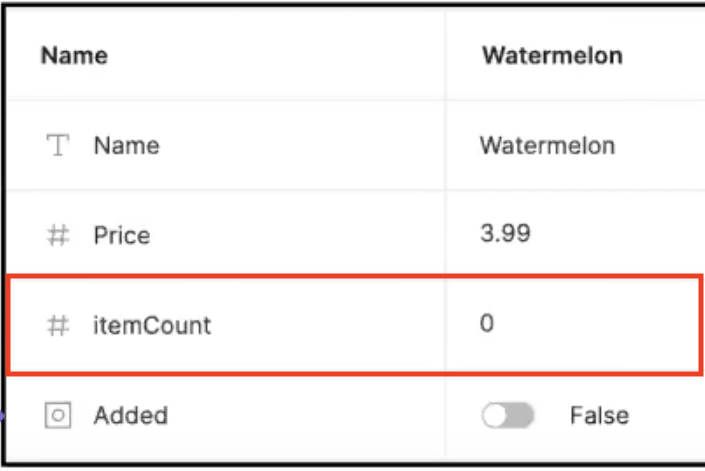
Image Credit: Figma
Step 2: Select the button and add interaction - on click - Conditional.
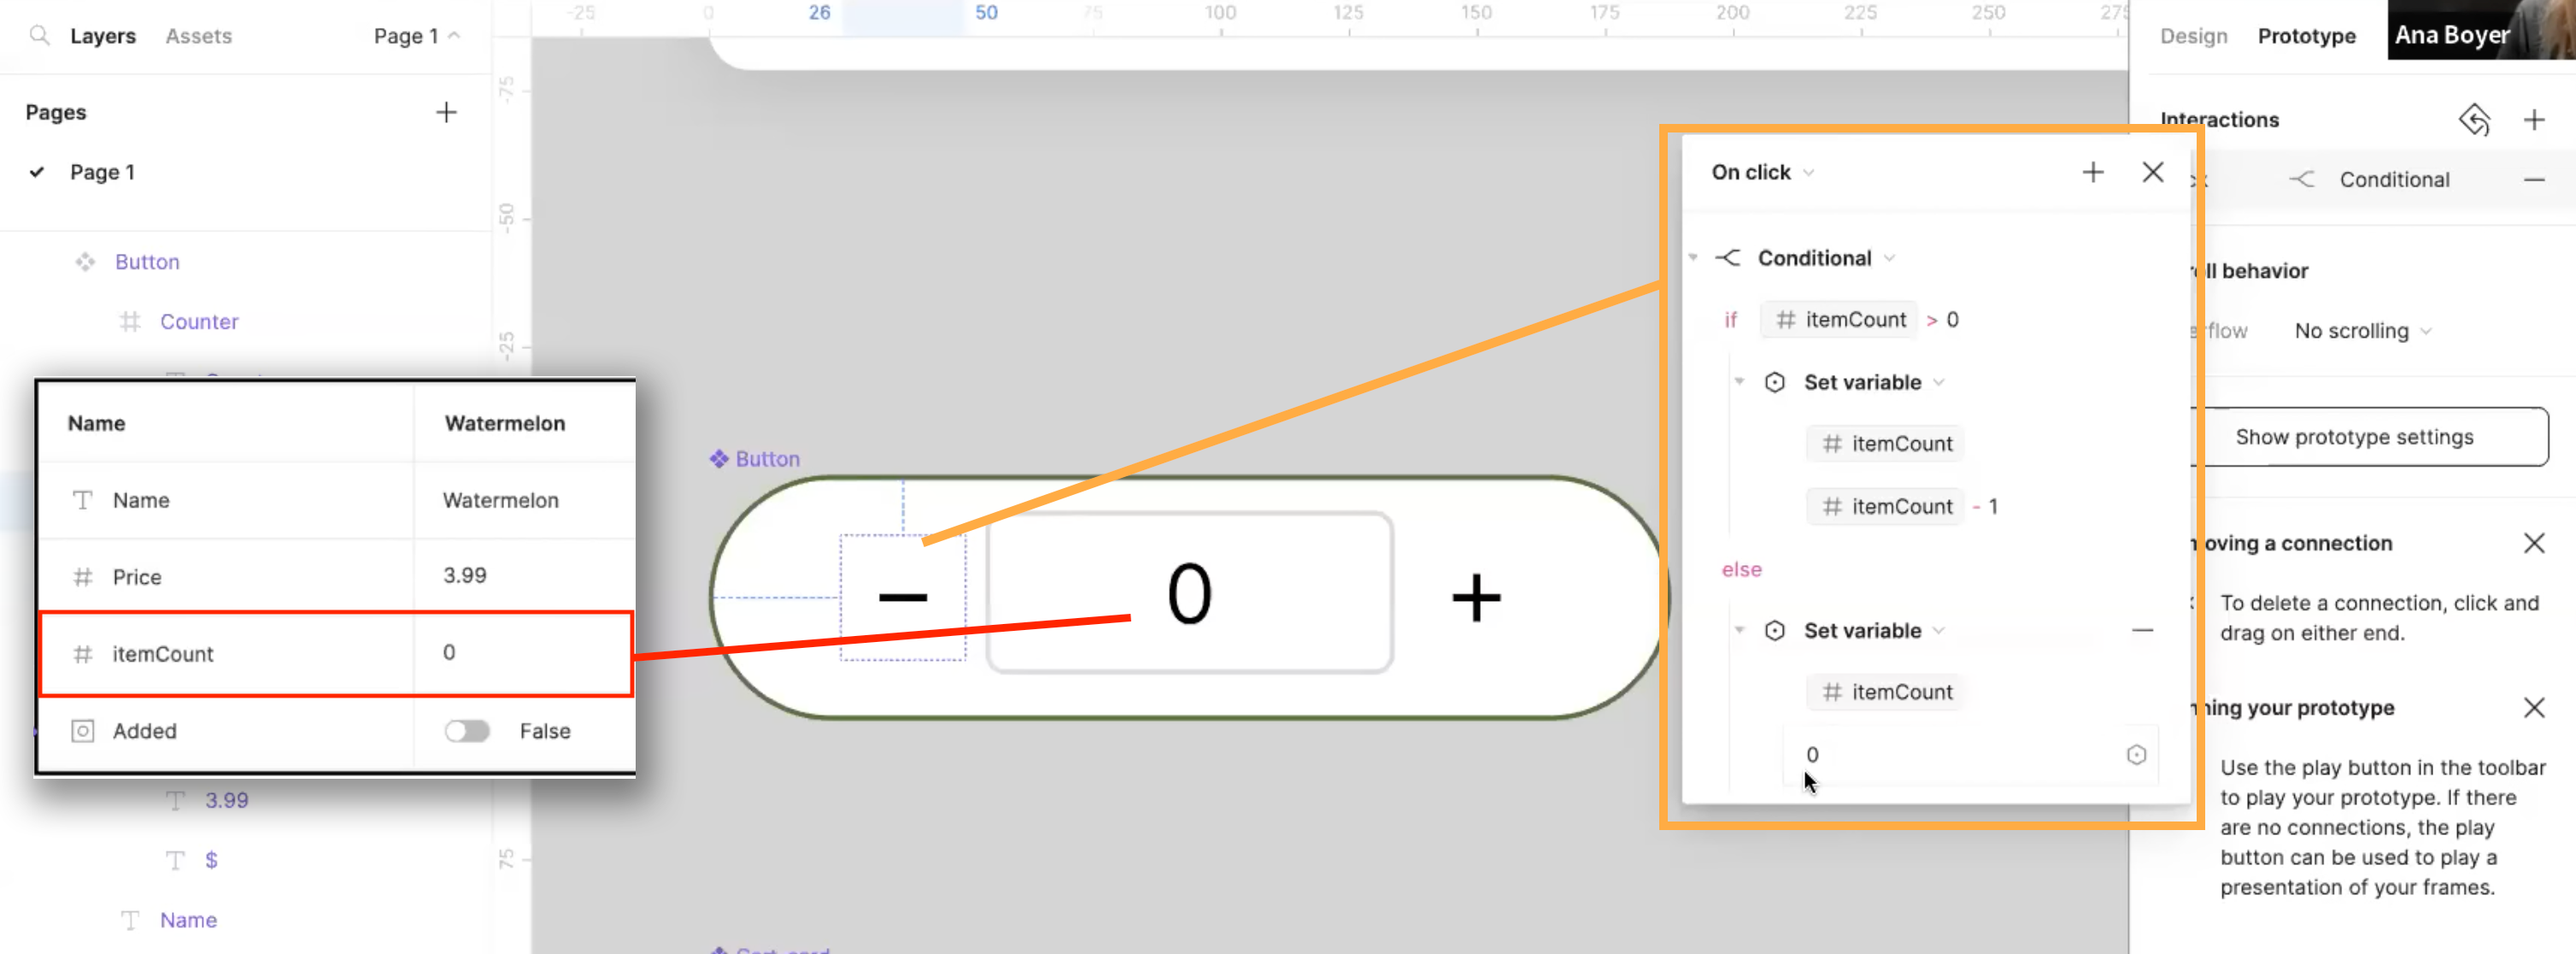
Image Credit: Figma
Step 3: Now you can apply a simple logic to the button by entering:
if #itemCount > 0 set variable #itemCount = #itemCount - 1
else #itemCount > 0 set variable #itemCount = 0
This logic ensures that when users click on the '-' button, the number will automatically decrease by 1. The 'else' condition prevents negative values.
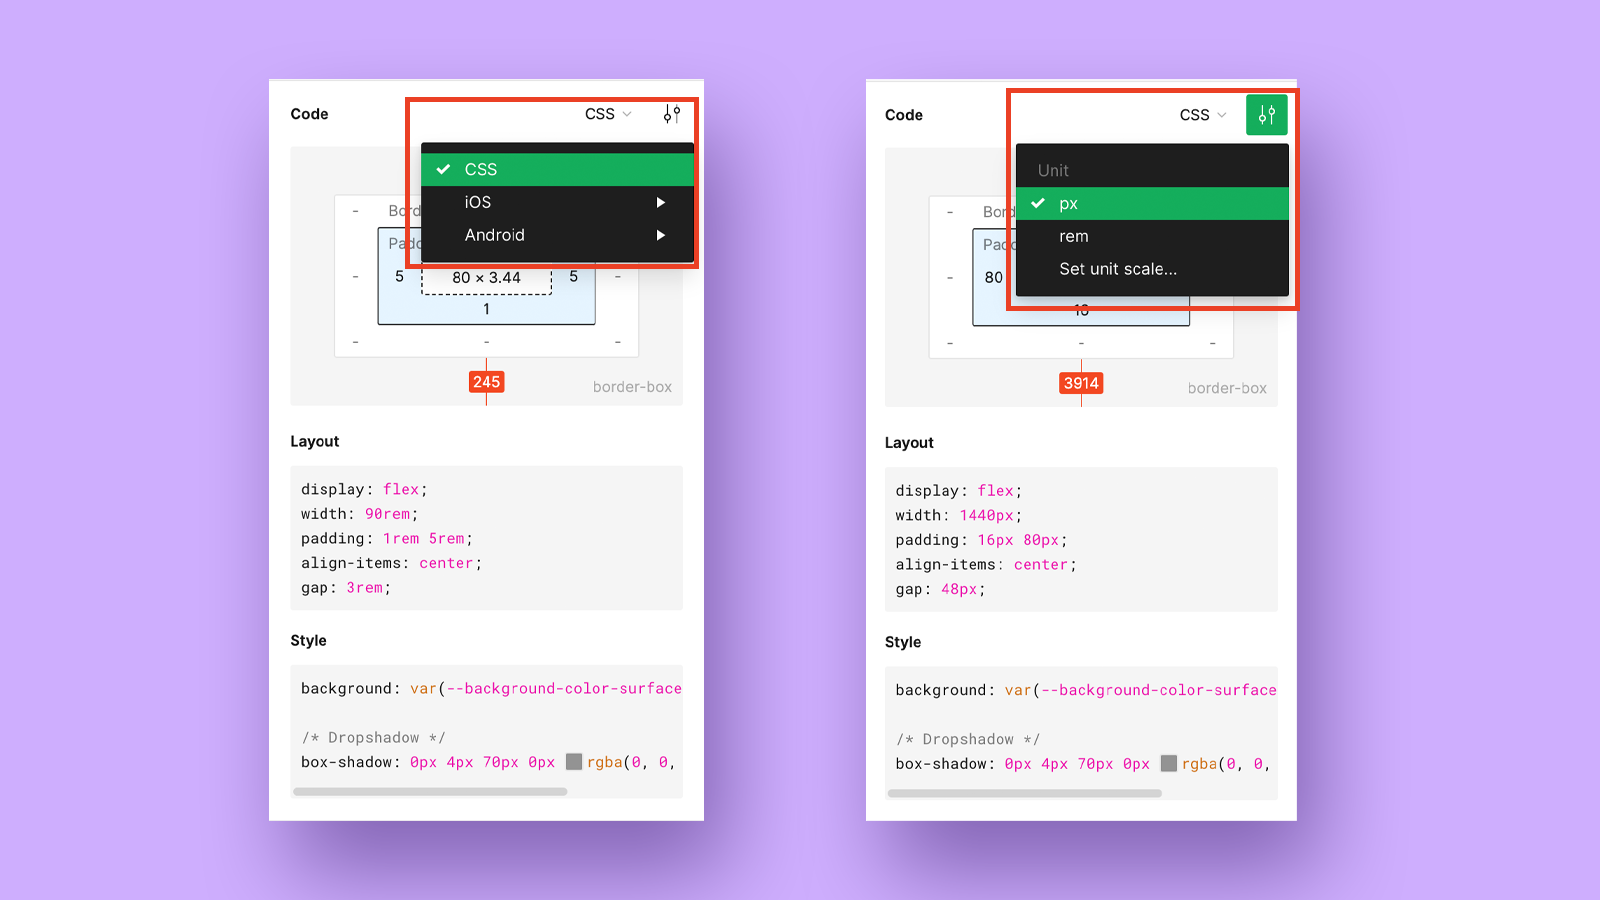
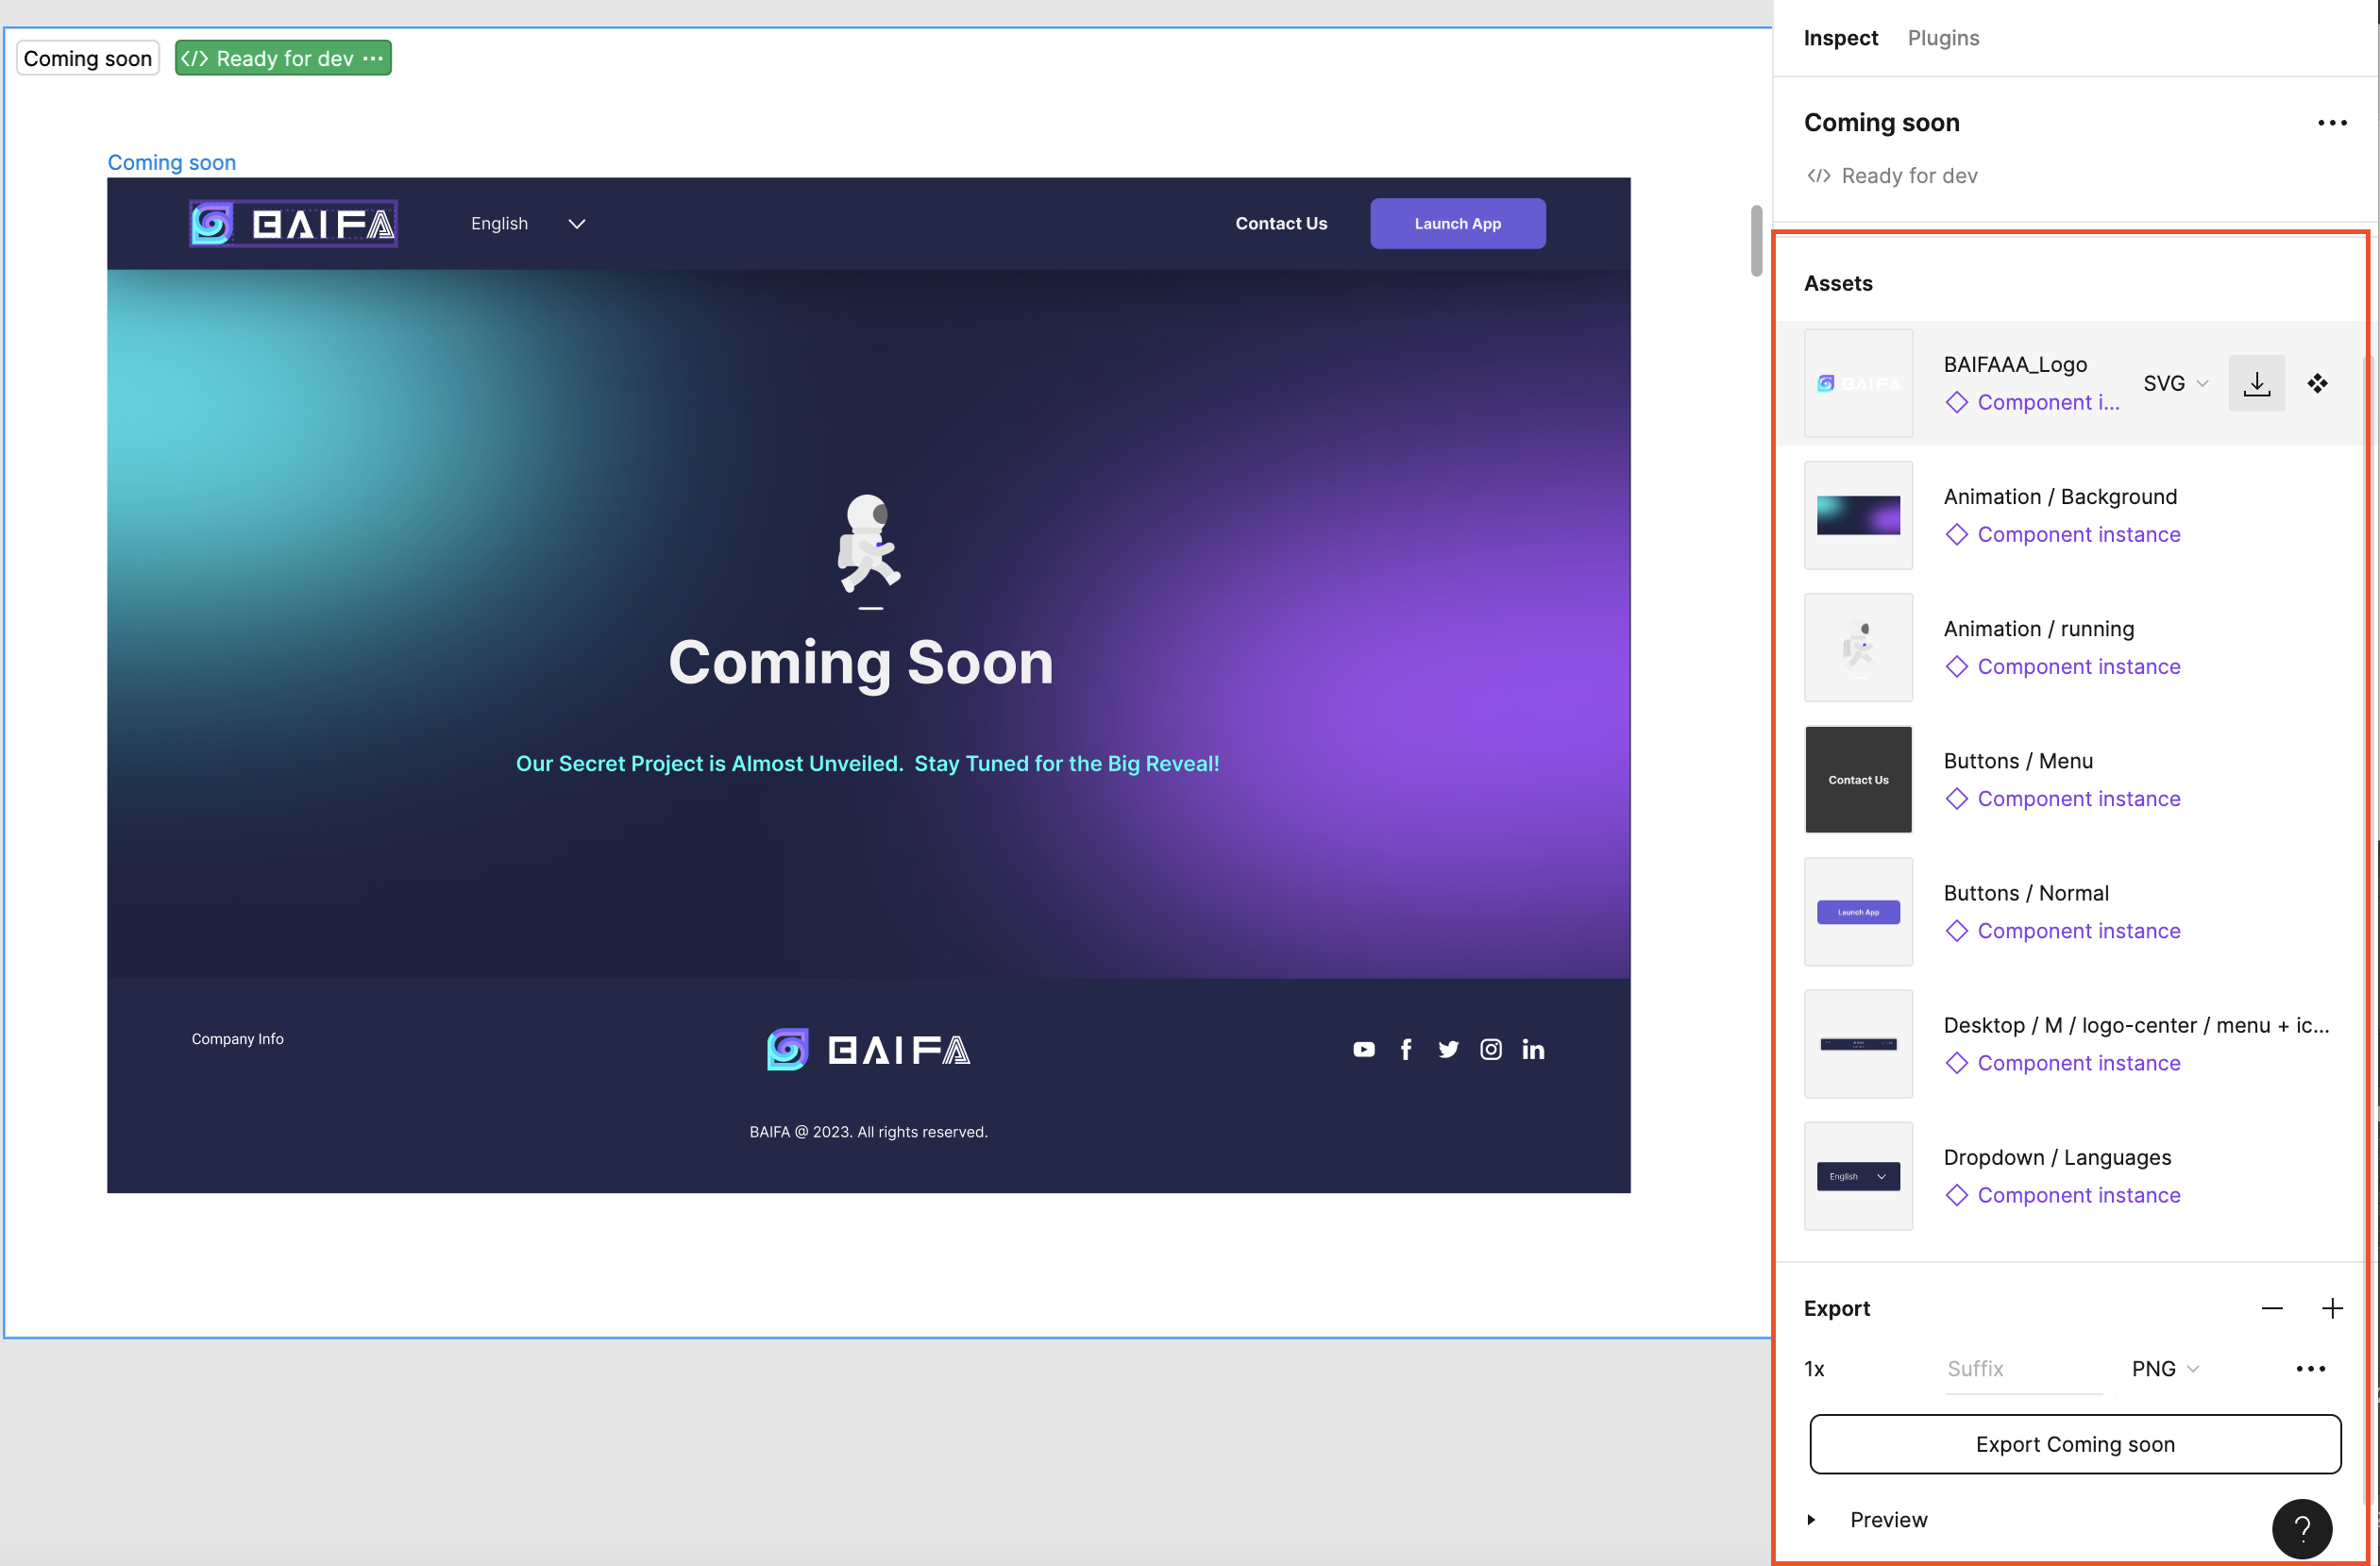
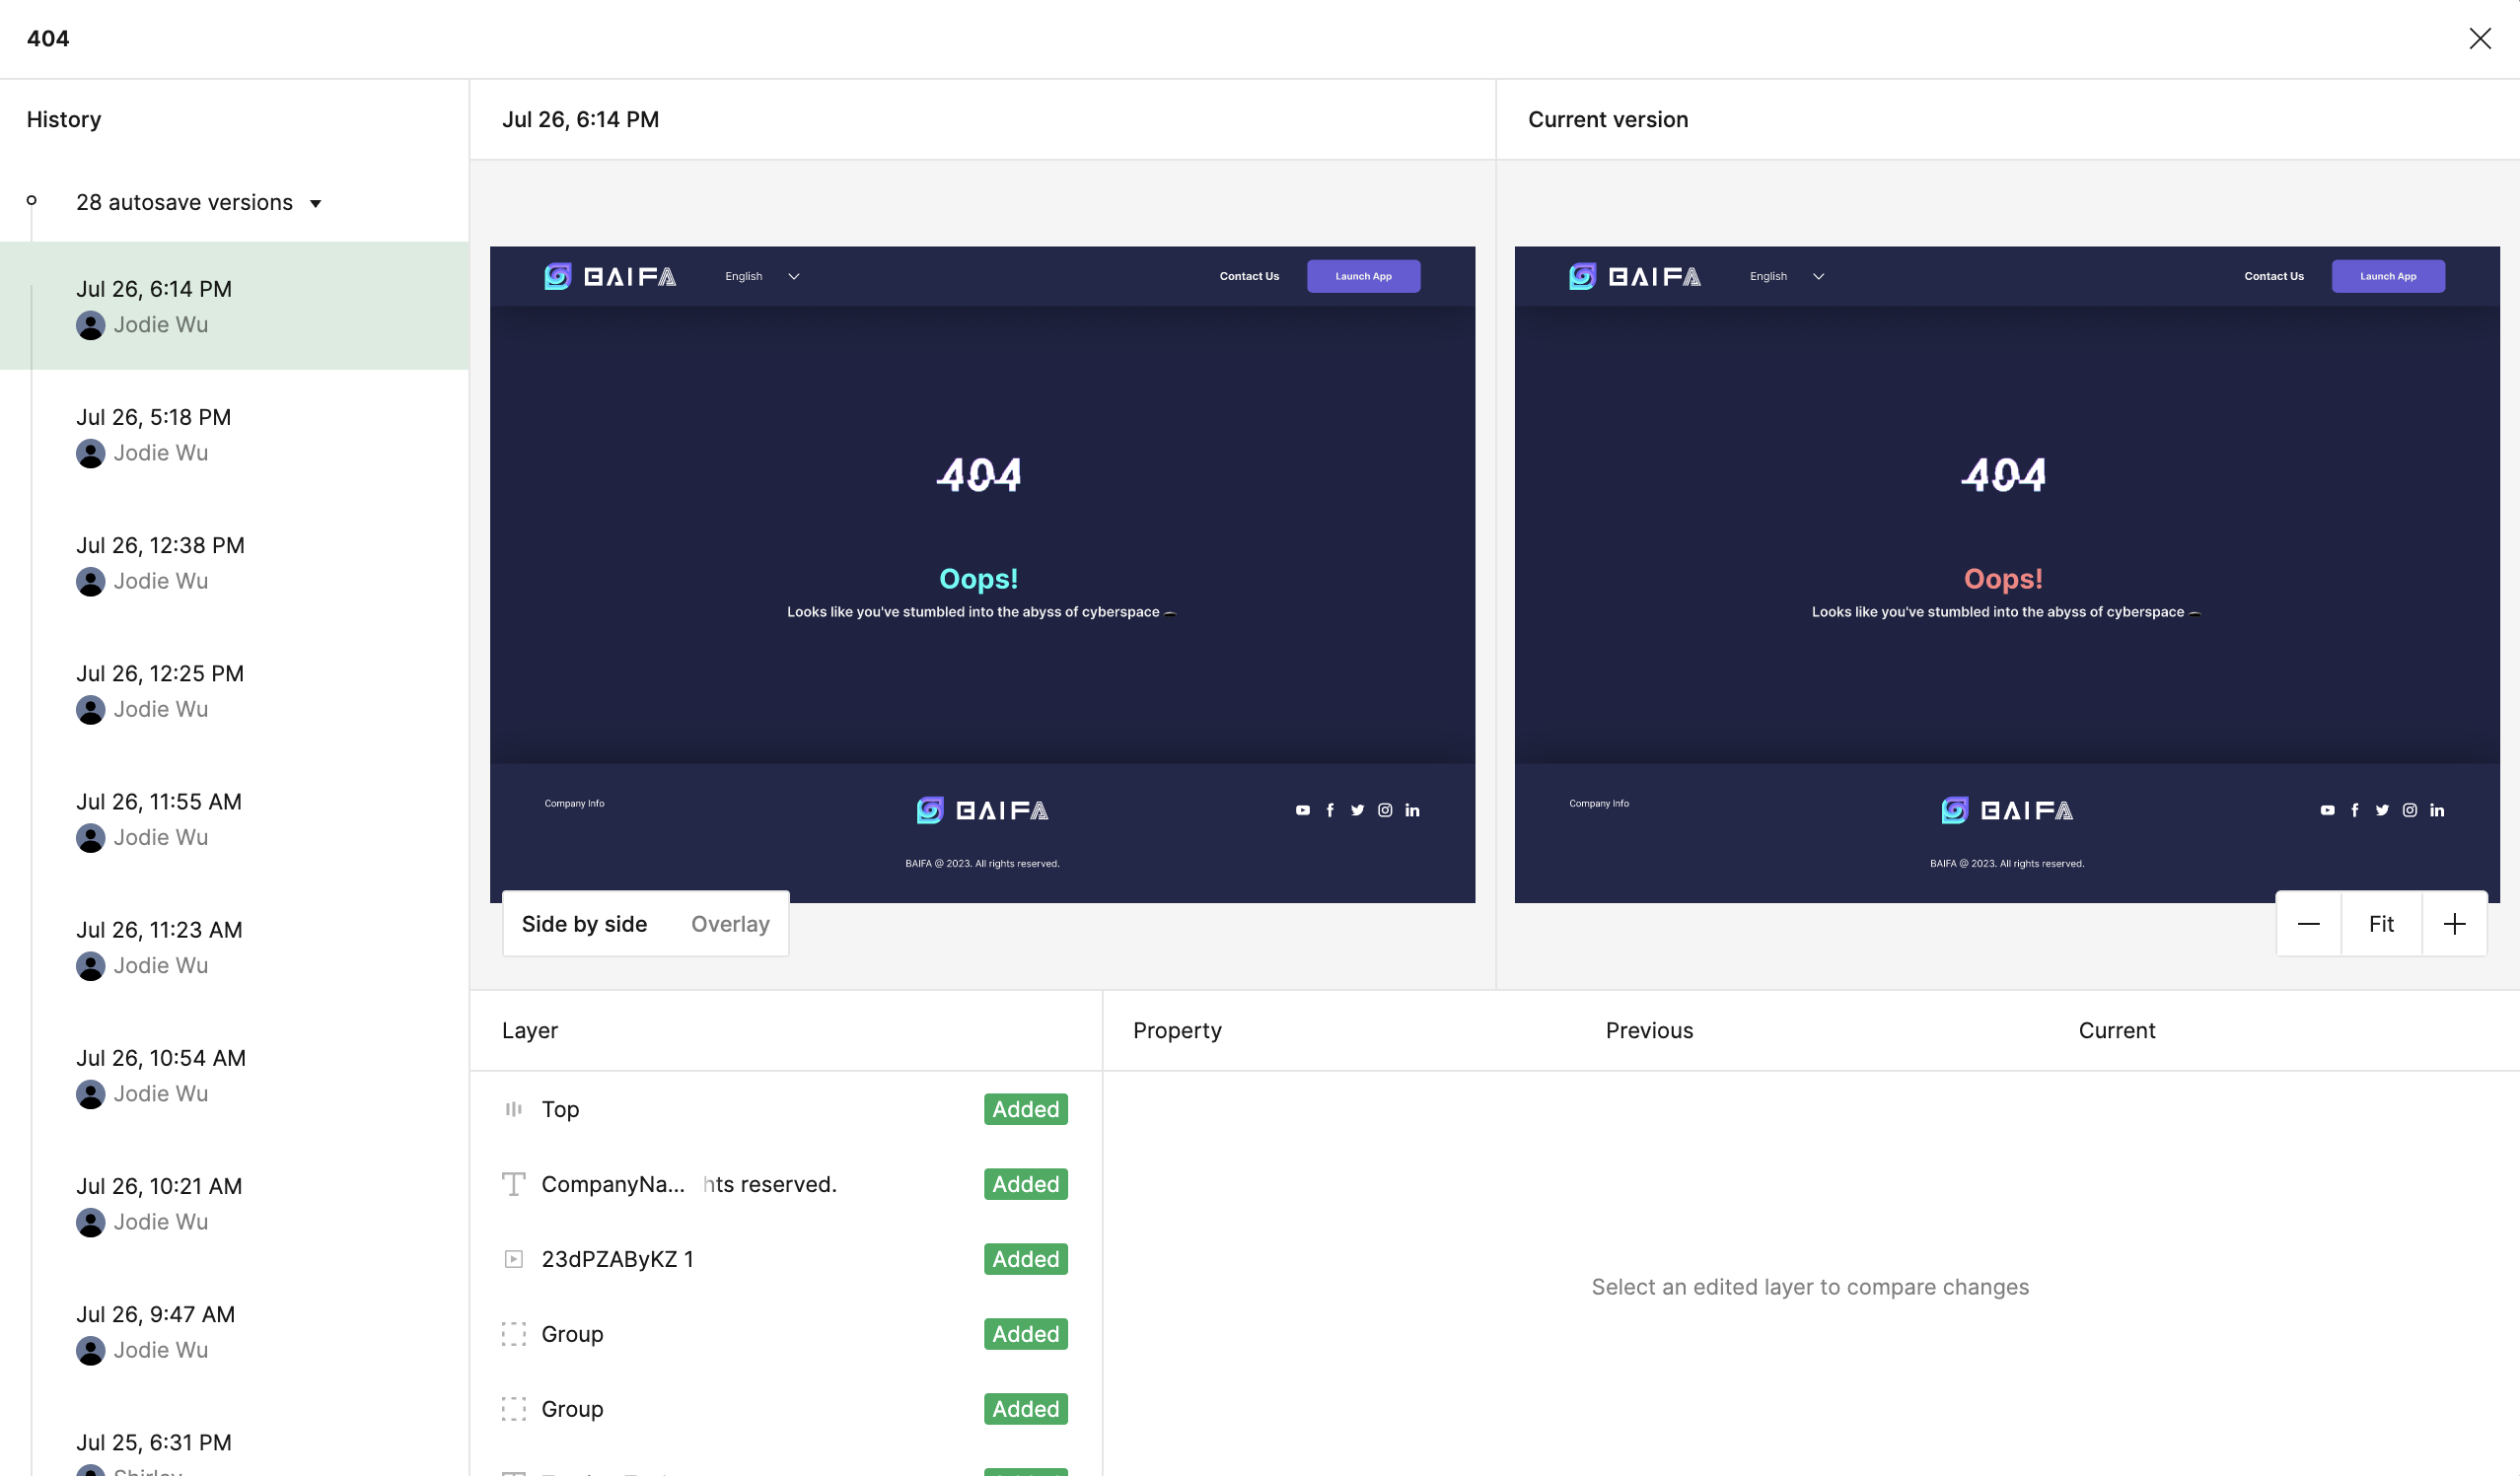
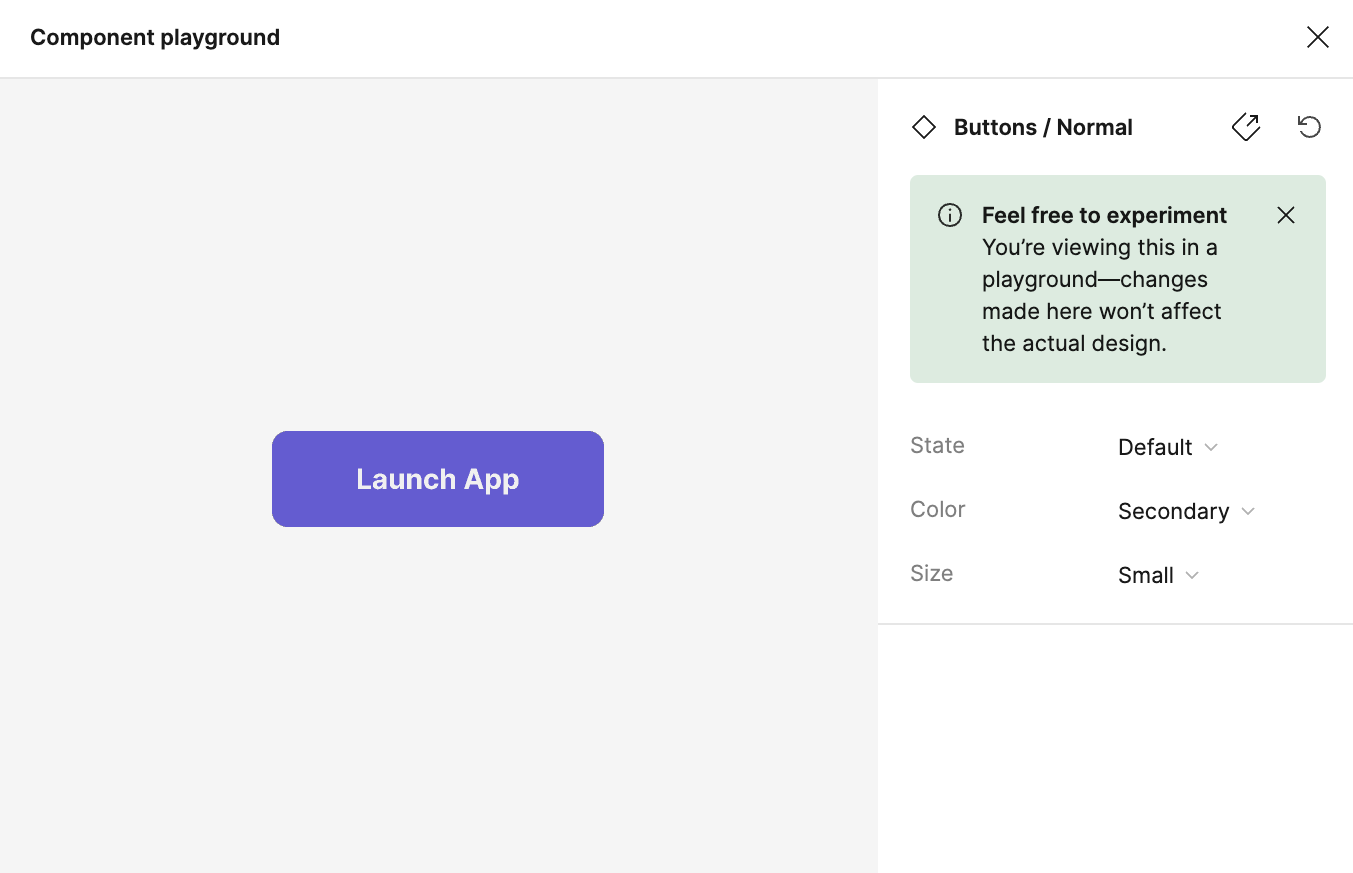
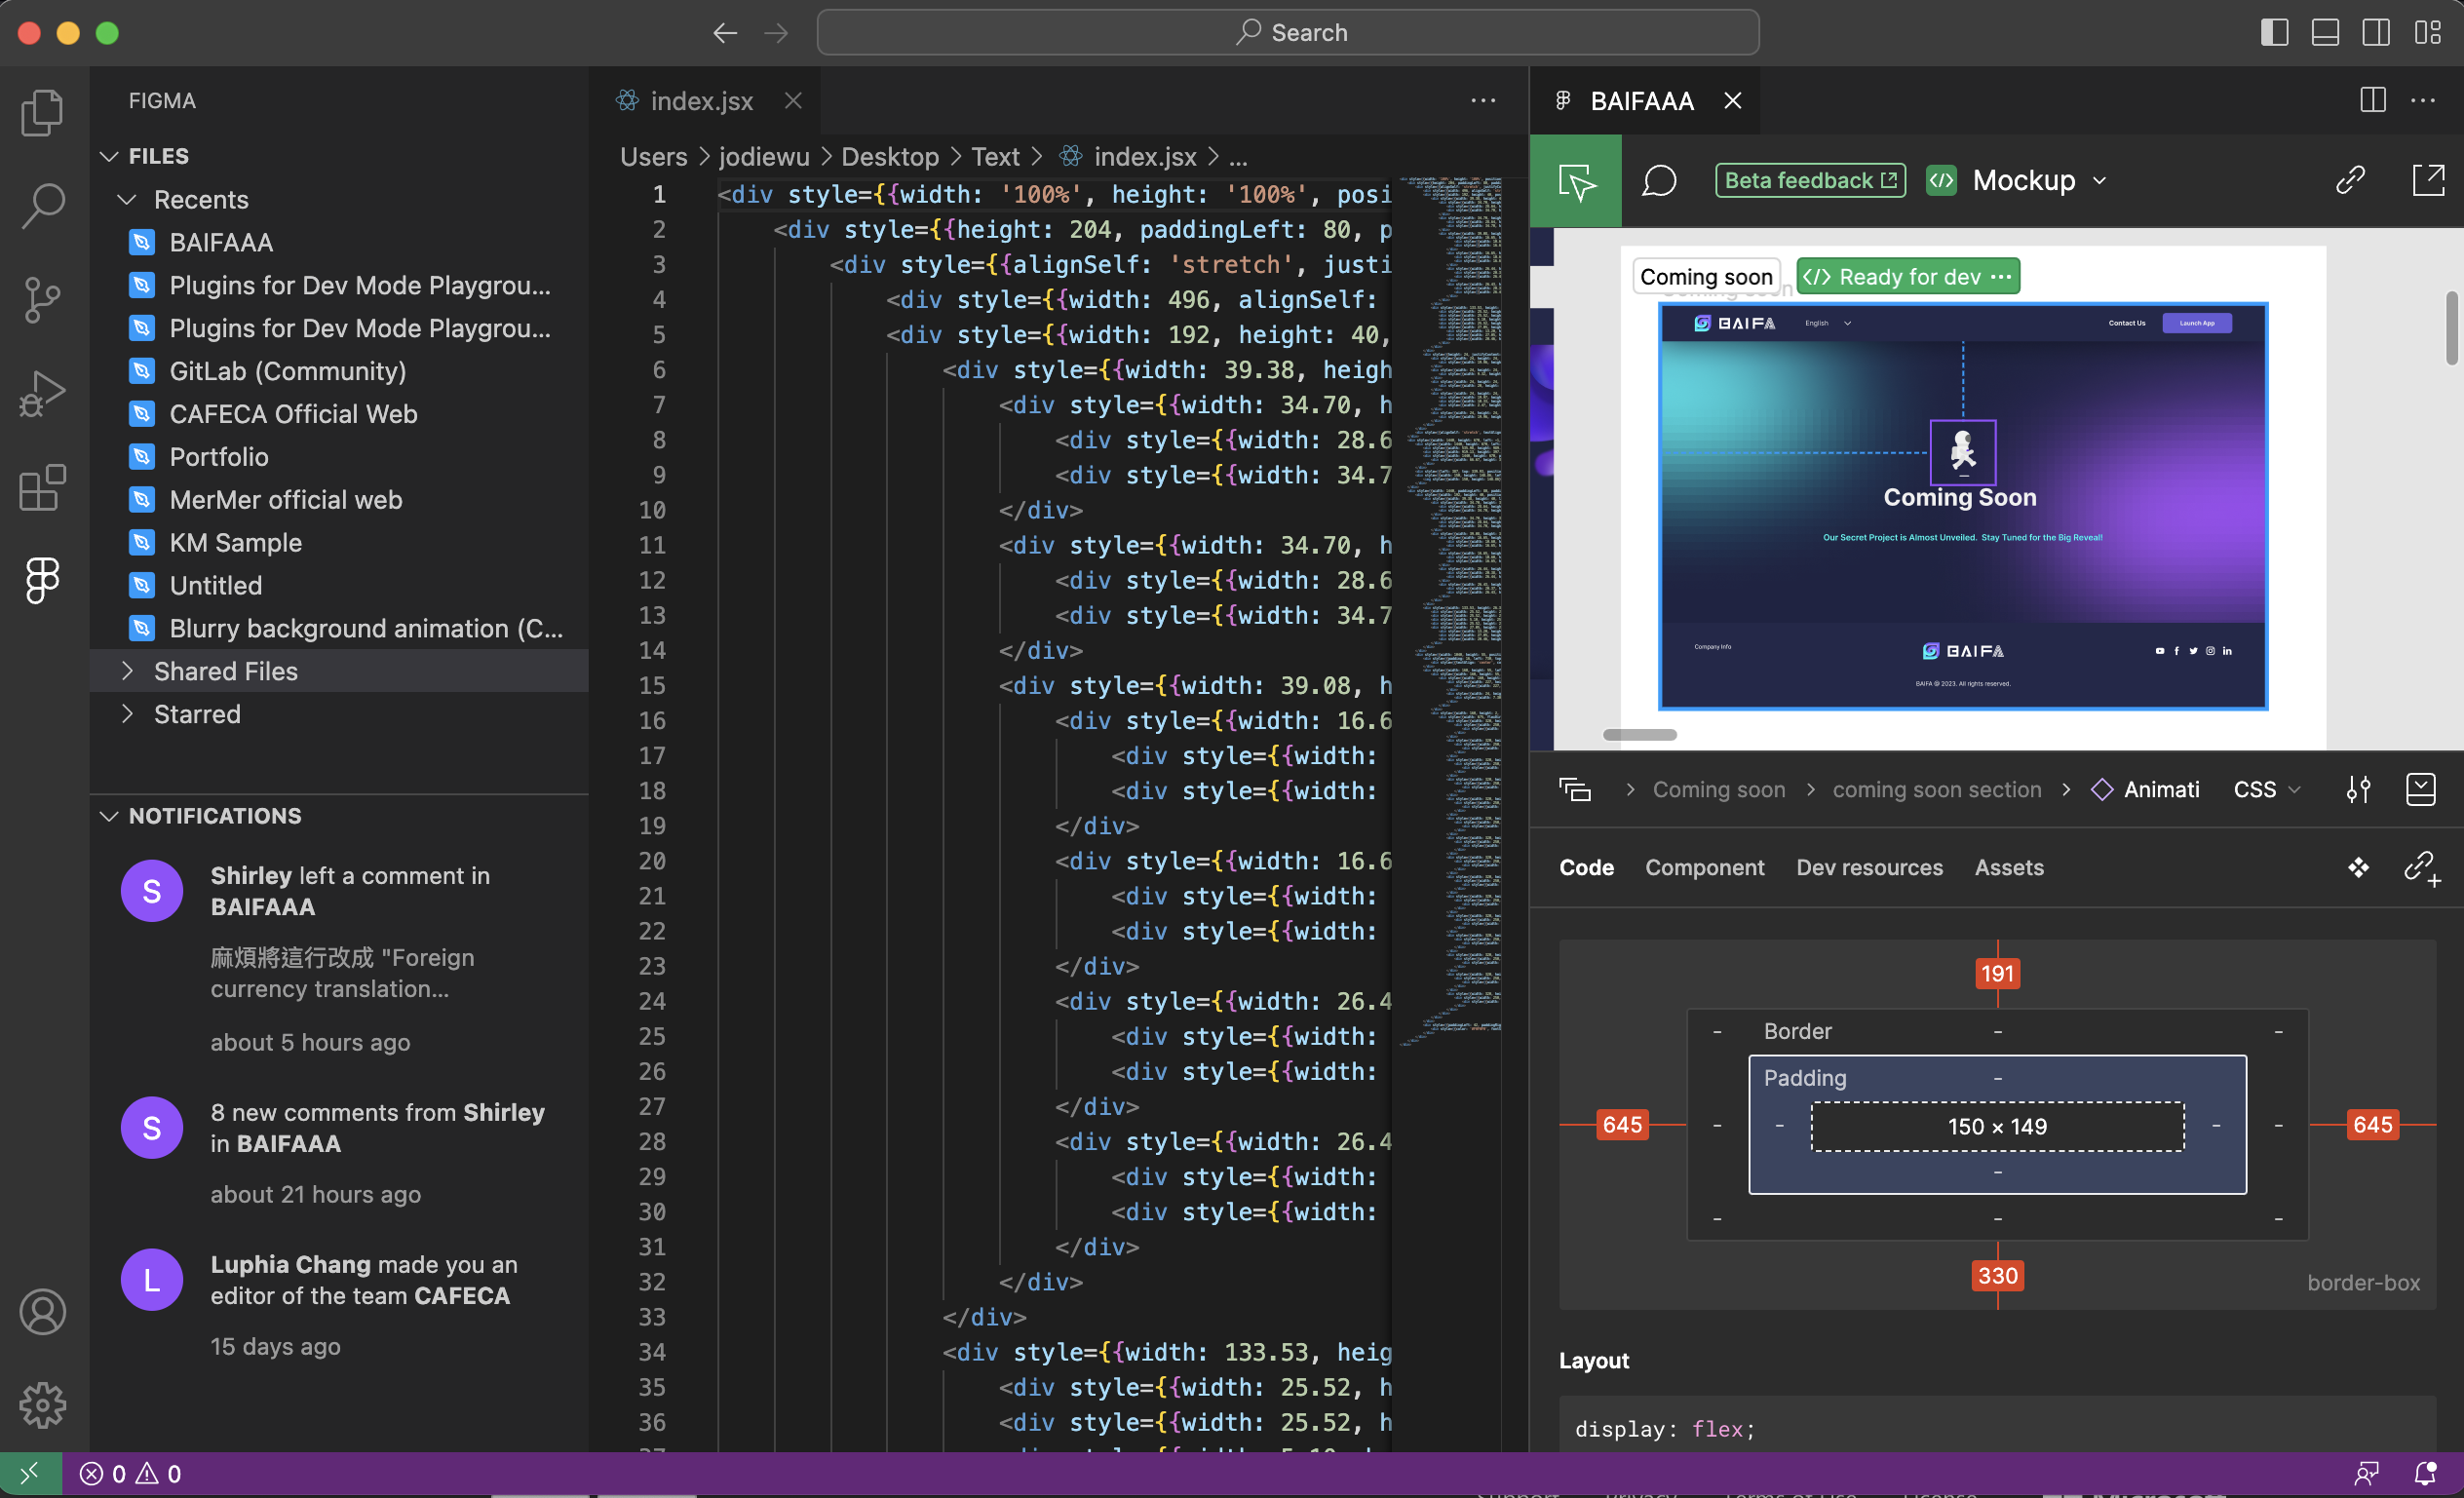
4. Dev-Mode
Features:
- Support different coding languages and dimension units
- Enhanced designer communication
- Easy asset download
- Compare changes
- Component playground
- Figma for VScode

Dev-Mode enhances design and development collaboration.
Coding languages and units support
Generate production-ready CSS, iOS, or Android code snippets from designs. Customize code using plugins.
Enhanced designer communication
Use the "Ready for dev" icon to identify completed design elements. Stay informed about design changes.

Easy asset download
Download assets with one click, even if not displayed in the Asset area.
Compare changes
Effortlessly compare design changes between versions.
Component playground
Explore component variants without affecting the design.
Figma for VScode
Use the Figma plugin for VSCode to inspect Figma files, collaborate with designers, and receive code suggestions.
References: Mizko, Figma Learn, DesignCourse, CoderOne
